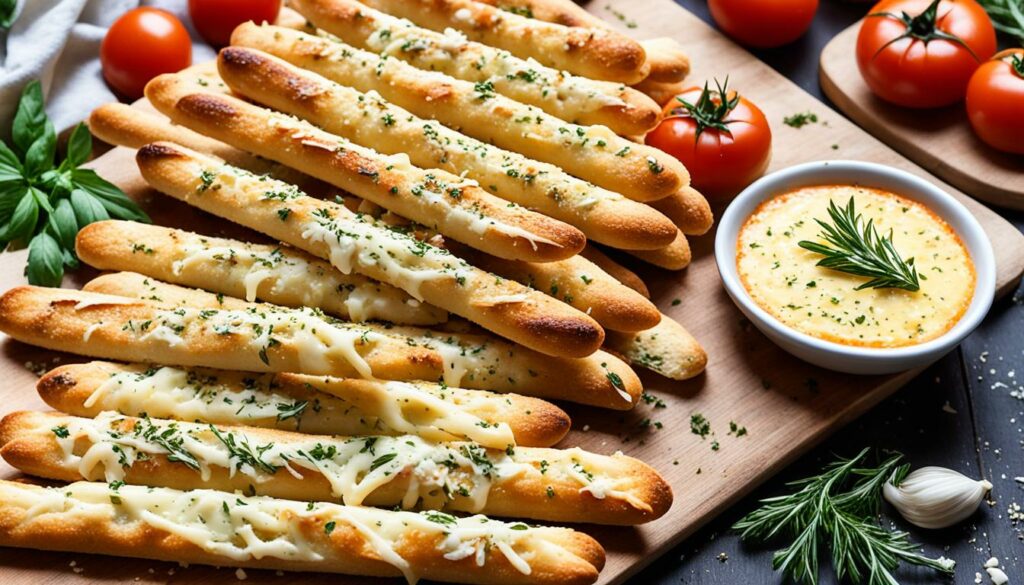
Welcome to our scrumptious recipe for homemade Asiago & Roasted Garlic Breadsticks! These delectable breadsticks are the perfect choice for appetizers or snacks, bursting with the rich flavors of asiago cheese and roasted garlic. In this article, we’ll provide you with an easy-to-follow recipe that will allow you to recreate these mouthwatering breadsticks in your own kitchen.
Do you love breadsticks? With our homemade asiago and roasted garlic breadsticks, you can experience the joy of freshly baked breadsticks right at home. No more settling for store-bought options when you can serve your guests and loved ones these irresistible treats.
Our recipe features a no knead artisan bread method, making it incredibly easy to achieve a crusty and chewy texture without the need for complicated techniques or fancy equipment. You’ll be amazed at how simple it is to create these flavorful breadsticks.
To make the dough for these breadsticks, you’ll only need a few basic ingredients: flour, salt, yeast, and warm water. The dough is mixed by hand and left to rise for a couple of hours at room temperature, allowing the flavors to develop and the dough to become light and airy.
In the meantime, you can roast the garlic cloves in the oven, transforming them into fragrant and caramelized additions that will elevate the taste of your breadsticks. The roasting process brings out the natural sweetness of the garlic, creating a deliciously savory flavor profile.
Once the dough has risen and the garlic cloves are ready, it’s time to add the star ingredient: asiago cheese. We recommend using freshly grated asiago cheese for the best results. Gently mix the cheese and roasted garlic into the dough, carefully incorporating all the ingredients for a perfectly balanced and indulgent breadstick.
Next comes the fun part – shaping the breadsticks! Shape the dough into a ball and then roll it out to form long, slender rods, reminiscent of classic breadstick shapes. This step ensures that every breadstick is evenly baked, creating a delightful balance of crispy exterior and soft interior.
Now, it’s time to bake these delectable breadsticks. Preheat your oven, including a Dutch oven pot, to 450 degrees Fahrenheit. Transfer the shaped dough into the hot pot, sprinkle additional cheese and garlic oil on top, and cover with a lid. The Dutch oven method ensures that the breadsticks develop a heavenly crispy crust while retaining their tender interior.
After 30 minutes of baking, remove the lid and let the breadsticks brown for an additional 15 minutes, taking them to a perfect golden hue. The irresistible aroma will fill your kitchen, signaling that your homemade Asiago & Roasted Garlic Breadsticks are ready to be devoured.
Serve these delightful breadsticks as an appetizer at your next gathering or indulge in them as a satisfying snack. The combination of the crusty, cheesy exterior and the aromatic, garlicky flavors will leave everyone craving more.
Left with any leftovers? No worries! Simply store them in a plastic bag on your counter, ensuring they stay fresh for future enjoyment. But be warned, these breadsticks have a tendency to disappear quickly!
Feel free to get creative with variations of these breadsticks by experimenting with different cheeses or herbs. Enhance the indulgence by pairing them with your favorite dipping sauces, such as marinara or a cheesy garlic dip.
With our easy recipe, you can become a breadstick aficionado and impress your family and friends with these homemade delights. Don’t just settle for any breadsticks – treat yourself to the unparalleled taste and satisfaction of our Asiago & Roasted Garlic Breadsticks.
Bake these breadsticks now and experience the joy of creating simple yet extraordinary homemade breadsticks that will have everyone asking for the recipe. Discover the perfect blend of flavors, textures, and pure deliciousness with each bite.You won’t be disappointed!
Easy No Knead Artisan Bread
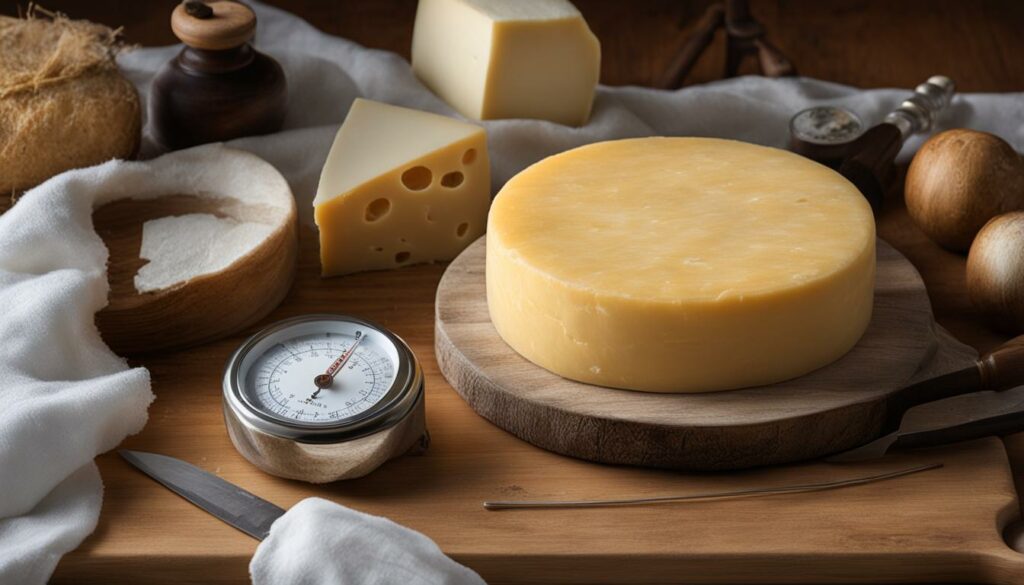
The recipe for these Asiago & Roasted Garlic Breadsticks uses a no knead artisan bread method. This means you don’t need a stand mixer or any complicated techniques to make the dough. The dough comes together in a simple bowl mix and rise process, resulting in a crusty and chewy breadstick.

Why Choose No Knead Artisan Bread?
No knead bread is a game-changer for home bakers. It simplifies the bread-making process, making it accessible to both beginners and experienced bakers. The beauty of this method lies in its simplicity. By allowing the dough to ferment and develop gluten on its own, you achieve a rustic, artisan-style bread with minimal effort.
“No-knead bread is perfect for busy individuals who crave the satisfaction of homemade bread but don’t have the time to dedicate to traditional kneading methods,” says bread expert Jane Baker.
With just a few ingredients and a little patience, you can create a delicious loaf of homemade bread that will impress family and friends.
How Does No Knead Artisan Bread Work?
The no knead artisan bread method follows a simple process:
- Mix the ingredients in a bowl: Combine flour, salt, yeast, and water in a bowl, stirring until a shaggy dough forms.
- Let the dough rise: Cover the bowl with plastic wrap and allow the dough to rise at room temperature for several hours or overnight.
- Shape the dough: Once the dough has risen, shape it into a round or oblong loaf.
- Bake the bread: Place the dough in a preheated Dutch oven and bake until golden brown and crusty.
This simple method allows the bread to develop a deep flavor and chewy texture, similar to bread found in artisan bakeries.
Benefits of No Knead Artisan Bread
No knead bread offers several advantages:
- Saves time: The no knead method requires minimal hands-on time, making it perfect for busy schedules.
- Easy technique: Anyone can make delicious homemade bread without needing advanced baking skills.
- Crusty crust: The Dutch oven baking technique creates a crispy, golden crust that is hard to resist.
- Versatility: You can customize your no knead artisan bread by adding various ingredients like herbs, seeds, or cheese.
Try your hand at this easy no knead artisan bread recipe and enjoy the satisfaction of homemade bread without the kneading!
Making the Dough and Roasting the Garlic
To prepare the dough for your delicious homemade breadsticks, gather these simple ingredients:
- 2 ½ cups of bread dough
- 1 teaspoon of salt
- 2 teaspoons of yeast
- 1 ½ cups of warm water
Start by combining the flour, salt, and yeast in a large mixing bowl. Gradually add the warm water, stirring with a wooden spoon until a sticky dough forms. Once the dough comes together, cover the bowl with a clean kitchen towel and let it rise for two hours at room temperature. During this time, your dough will grow in size and develop a light, airy texture.
While the dough is rising, take the opportunity to roast the garlic cloves. Preheat your oven to 400°F (200°C). Peel the outer layers of garlic cloves, leaving them intact. Place the cloves on a baking sheet lined with parchment paper, drizzle with olive oil, and season with salt and pepper. Roast the garlic in the oven for 20 minutes until they become soft and golden. The roasting process enhances the garlic’s natural sweetness and brings out its rich flavor.
Pro Tip: Roasting garlic cloves creates a smooth, mellow flavor that complements the breadsticks perfectly. Don’t skip this step!
Once the dough has completed its rise and the garlic cloves have been roasted to perfection, you’re ready to proceed to the next step.
Adding Asiago Cheese and Shaping the Breadsticks
Once the dough has risen and the garlic cloves are roasted, it’s time to add the delicious grated asiago cheese to the dough.
Mix the cheese and garlic into the dough, then shape it into a ball. This will create pockets of cheesy, garlicky goodness in each breadstick.
Here’s a step-by-step guide on how to add the asiago cheese and shape the breadsticks:
- Take the risen dough and place it on a lightly floured surface.
- Sprinkle some flour on top of the dough to prevent sticking.
- Using your hands, gently flatten the dough into a rectangle shape.
- Sprinkle the grated asiago cheese evenly over the dough.
- Next, take one short end of the dough and fold it towards the center.
- Repeat the folding process with the other short end of the dough.
- Press the seams together to seal the cheese inside the dough.
- Gently roll the dough into a log shape, about 1 inch thick.
- Cut the log into individual breadsticks, about 6-8 inches long.
- Place the breadsticks on a lined baking sheet, leaving some space between each.
Your asiago cheese-filled breadsticks are now ready to be baked and enjoyed!

Baking the Breadsticks
Now that you have shaped the dough into delicious Asiago & Roasted Garlic Breadsticks, it’s time to bake them to perfection. Preheat your oven, including a Dutch oven pot, to 450 degrees Fahrenheit to ensure a crispy crust and irresistible flavor.
Transfer the shaped dough into the hot Dutch oven pot, allowing the breadsticks to take on the full heat and evenly bake. To enhance the flavors, sprinkle more grated asiago cheese and a drizzle of garlic-infused oil on top of the breadsticks.
Tip: The combination of melted cheese and aromatic garlic will add depth to the flavors, making every bite a delightful experience.
Once you have added the final touches, cover the Dutch oven with its lid to trap the steam and moisture, creating the perfect baking environment. The covered pot will help the breadsticks develop a crispy crust while maintaining a soft and tender interior.
Pro Tip: The Dutch oven’s enclosed space generates intense heat, allowing the breadsticks to rise and bake evenly.
Bake the breadsticks in the Dutch oven for approximately 30 minutes. This duration ensures that the breadsticks develop a golden and crispy outer layer. However, the journey doesn’t end here. In the final 15 minutes of baking, remove the lid from the Dutch oven to give the breadsticks a beautifully browned appearance.
Remember: Removing the lid during the last stage of baking will promote browning and result in a visually appealing presentation.

As the aromas of freshly baked breadsticks fill your kitchen, eagerly anticipate the moment when you can savor your culinary creation.
| Baking Time | Temperature | Baking Technique |
|---|---|---|
| 30 minutes | 450°F | Baking in a covered Dutch oven |
| 15 minutes | 450°F | Baking with the lid removed |
With their crispy crust, warm center, and irresistible flavors, these freshly baked breadsticks are truly a delight. Your guests will be impressed, and you’ll have a scrumptious appetizer or snack ready to enjoy.
Serving and Storing the Breadsticks
Once you’ve baked the mouthwatering Asiago & Roasted Garlic Breadsticks, it’s time to serve and enjoy them. Follow these simple steps to savor every bite:
- Allow the breadsticks to cool on a wire rack to maintain their crispy texture.
- Once cooled, carefully slice the breadsticks into individual portions. This will make them easy to handle and share.
- Whether you’re hosting a gathering or simply indulging on your own, serve the breadsticks as an irresistible appetizer or snack. They’re perfect for dipping or enjoying on their own.
Now, what do you do with any leftovers you may have? Don’t worry, we’ve got you covered!
Leftover breadsticks can be stored in a plastic bag, keeping them fresh for future enjoyment. Here are a few tips to ensure they stay delicious:
- Remove as much air as possible from the bag and seal it tightly. This will help prevent the breadsticks from becoming stale.
- Store the bag on the counter at room temperature. This will maintain the breadsticks’ texture and flavor.
- If you want to extend their shelf life even further, you can freeze the breadsticks in an airtight container. Just make sure to thaw them before reheating.
When you’re ready to enjoy the leftovers, simply reheat the breadsticks in the oven for a few minutes until warm. They’ll taste just as delicious as when they were freshly baked!
With these serving and storing tips, you can make the most out of your homemade Asiago & Roasted Garlic Breadsticks. Whether you’re sharing them with friends or treating yourself, every bite will be a delight.

Variations and Pairings
While this recipe uses asiago cheese and roasted garlic, you can get creative and customize your breadsticks by incorporating different cheeses or herbs. Experimenting with various flavors will add excitement and uniqueness to your snack. Here are some delicious breadstick variations to consider:
- Classic Parmesan: Replace asiago cheese with grated Parmesan for a tangy and salty twist.
- Herb-infused: Add dried herbs like oregano, thyme, or rosemary to the dough for an aromatic and flavorful experience.
- Sundried Tomato and Basil: Incorporate chopped sundried tomatoes and fresh basil leaves into the dough for a savory and vibrant taste.
- Spicy Jalapeno and Cheddar: Toss in some diced jalapenos and shredded cheddar cheese for a fiery kick and creamy texture.
Pairing your breadsticks with the right dipping sauce can elevate the flavors and enhance your snacking experience. Here are some delightful dip options:
- Marinara Sauce: A classic choice that complements the cheesy and garlicky flavors of the breadsticks.
- Garlic Butter: Melted butter mixed with minced garlic, perfect for dipping and enhancing the garlic flavor in the breadsticks.
- Herb-infused Olive Oil: Create a flavorful dip by mixing olive oil with herbs like basil, rosemary, or thyme.
- Balsamic Glaze: Drizzle a sweet and tangy balsamic glaze over the breadsticks for a gourmet touch.
Remember, the possibilities are endless when it comes to breadstick variations and pairings. Feel free to experiment with different ingredients and flavors to create your own unique combinations.
| Breadstick Variation | Description |
|---|---|
| Classic Parmesan | Replace asiago cheese with grated Parmesan for a tangy and salty twist. |
| Herb-infused | Add dried herbs like oregano, thyme, or rosemary to the dough for an aromatic and flavorful experience. |
| Sundried Tomato and Basil | Incorporate chopped sundried tomatoes and fresh basil leaves into the dough for a savory and vibrant taste. |
| Spicy Jalapeno and Cheddar | Toss in some diced jalapenos and shredded cheddar cheese for a fiery kick and creamy texture. |
When it comes to dipping sauces, here are some excellent options to enhance the flavor of your breadsticks:
| Dipping Sauce | Description |
|---|---|
| Marinara Sauce | A classic choice that complements the cheesy and garlicky flavors of the breadsticks. |
| Garlic Butter | Melted butter mixed with minced garlic, perfect for dipping and enhancing the garlic flavor in the breadsticks. |
| Herb-infused Olive Oil | Create a flavorful dip by mixing olive oil with herbs like basil, rosemary, or thyme. |
| Balsamic Glaze | Drizzle a sweet and tangy balsamic glaze over the breadsticks for a gourmet touch. |
Conclusion
These homemade Asiago & Roasted Garlic Breadsticks are the ultimate crowd-pleasing appetizer or snack. With their crispy crust, melted cheese, and aromatic garlic flavor, they are a delicious addition to any gathering or meal. You don’t have to be an expert baker to enjoy these breadsticks – the easy no-knead artisan bread method simplifies the process, making it accessible to all.
By following this easy recipe, you can create a batch of these homemade breadsticks in your very own kitchen. The combination of asiago cheese and roasted garlic adds a unique and satisfying twist, elevating these breadsticks to a whole new level of deliciousness. Whether you’re hosting a party, enjoying a family meal, or looking for a tasty snack, these breadsticks are sure to be a hit.
So why settle for store-bought breadsticks when you can make your own? Impress your guests with the irresistible aroma and taste of freshly baked bread. With just a few simple steps, you can enjoy these homemade breadsticks that are perfect for dipping into marinara sauce or enjoying on their own. Give this recipe a try and savor the delightfully addictive flavors of these Asiago & Roasted Garlic Breadsticks.
FAQ
Can I customize the breadsticks with different cheeses or herbs?
Yes, you can easily customize the breadsticks by using different cheeses or herbs to suit your taste preferences.
How should I store the leftover breadsticks?
Any leftover breadsticks can be stored in a plastic bag on the counter for future enjoyment.
Are these breadsticks difficult to make?
Not at all! This recipe uses a simple no knead artisan bread method, making it accessible to even novice bakers.